In the first article, “MessageQueue in .NET, Part 1: The Background Work on Windows,” you saw how to set up MSMQ and what its purpose is. With today’s article, you will learn how to create two entirely different programs that can send messages to one another with the help of MSMQ.
First, a quick recap, for in case you have forgotten.
What Is MSMQ?
Microsoft Message Queuing (MSMQ) is a messaging protocol that allows applications running on separate processes or servers to communicate with one another. A queue, in this sense, is a temporary storage location from which messages can be sent and received, thus enabling communication across networks and between Windows PCs, which may not always be connected.
MSMQ delivers messages reliably between applications inside and outside the enterprise. Reliably, because it places messages that fail to reach their destinations in a queue and then resends them when the destination becomes reachable.
Coding
As mentioned earlier, we need two separate programs, so you will create an ASP.NET Webforms applications, as well as a Windows Forms application. There isn’t much code to either of them, but the code is quite powerful.
The ASP.NET Project
Create a new Webforms project in ASP.NET using Visual Studio. After the default page has loaded, add a Reference to System.Messaging by clicking Project, Add Reference, and selecting it from the list, as shown in Figure 1.
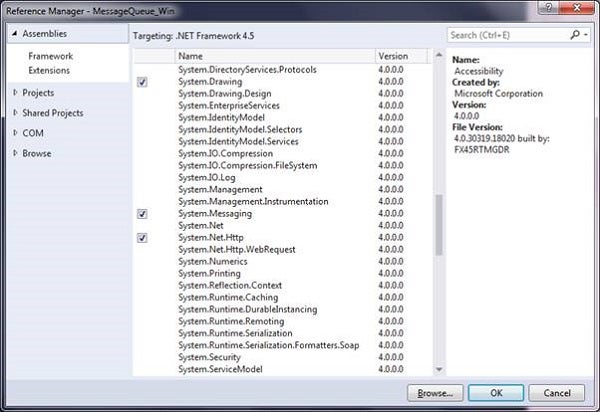
Figure 1: Reference Manager
This enables the project to have access to all the MSMQ capabilities. You still need to import the namespace in code as well, but we will do that momentarily.
Add a button onto the webform. Name it btnSendMessage, for example.
Add the code for the Default.aspx webform:
Imports System.Messaging

Public Class _Default
   Inherits Page

   Protected Sub Page_Load(ByVal sender As Object, ByVal e _
      As EventArgs) Handles Me.Load

   End Sub

   Protected Sub btnSendMessage_Click(sender As Object, e _
         As EventArgs) Handles btnSendMessage.Click

      Dim mess As New Message
      Dim que As New MessageQueue(".\private$\HTGMsg")

      mess.Label = "Hi there!"
      mess.Body = "This message comes from the web"

      que.Path = ".\private$\HTGMsg"


      If Not MessageQueue.Exists(que.Path) Then

         MessageQueue.Create(que.Path)

      Else

         que = New MessageQueue(que.Path)

         que.Send(mess, "To Windows App")

      End If

   End Sub
Here, you create a new MessageQueue object which links into MSMQ on the PC. You specify a name for it, and then its body and label. Finally, if a similar object already exists, it must queue the message; otherwise, it must first create it.
Now, the Windows Forms project.
Windows Form
Use Visual Studio to create a new Windows Forms application. Once the project has loaded, set a reference to System.Messaging as well, as shown earlier. Add a button onto the form and name it btnRecieve, and then add a ListBox named lstMessage. Lastly, add the following code to your form:
Imports System.Messaging

Public Class Form1
   Private Sub btnRecieve_Click(sender As Object, e As EventArgs) _
         Handles btnRecieve.Click

      Dim mess As New Message
      Dim que As New MessageQueue(".\private$\HTGMsg")

      mess = que.Receive()

      mess.Formatter = New XmlMessageFormatter(New String() _
         {"System.String,mscorlib"})
      Dim body As String = mess.Body.ToString()

      lstMessage.Items.Add(body.ToString())


   End Sub
End Class
This creates a Messagequeue object and receives it based on the name. The body is in XML format, so it must be clean of the XML encoding tags, and then it gets displayed in a ListBox.
Conclusion
This concludes my MSMQ series. In this article, you have learned how to create a Windows and Web application that make use of the MSMQ to send messages to each other.