Introduction
I am by nature a very lazy person. Couple my laziness with curiosity and enthusiasm and you end up with wacky solutions to problems you never knew existed. Have you ever wondered how to programmatically add items to the Windows context menu? Let’s say, for example: You would like to add an item under the ‘Send To’ menu, or you would like to add a menu such as ‘Copy to Folder’ to the Windows menu. It is possible and it is quite easy; you just need a bit of Registry manipulation.
Today, you will learn how to add a ‘Copy to Folder’ option and another menu option onto the Windows context menu.
Practical
Create a new C# or VB.NET Windows Forms project. Once the form has finished loading, add two buttons to the form. Your simple design should look like Figure 1.
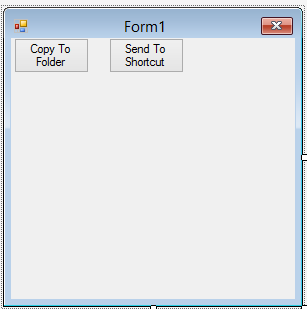
Figure 1: Our Design
To add the ‘Copy to Folder‘ option to a system menu, you need to manipulate the Registry. If you are uncertain of what I mean by ‘Copy to Folder,’ take a look at Figure 2.

Figure 2: Copy to Folder
The ‘Copy to Folder’ option enables you to copy files directly to a folder without navigating to it through Windows Explorer. You simply select the Folder you’d want to copy to and voilà! Let’s add this menu option now, starting with the namespaces, as usual.
C#
using Microsoft.Win32;
VB.NET
Imports Microsoft.Win32
The Microsoft.Win32 Namespace contains all the classes and methods for any Registry manipulation. Many professional programmers do not like manipulating the Registry, especially with system settings. I agree with them, but not completely. If you know what you are doing, why not use the Registry? Why reinvent the wheel, and why overcomplicate certain things? Enough ranting from me.
Add the following member variables:
C#
      private RegistryKey rkReg = Registry.ClassesRoot;

      private string strKey = @"AllFilesystemObjects\shellex\
         ContextMenuHandlers\CopyTo";
      private string strClSID = "{C2FBB630-2971-11D1-A18C-
         00C04FD75D13}";
VB.NET
   Private rkReg As RegistryKey = Registry.ClassesRoot

   Private strKey As String = "AllFilesystemObjects\shellex\ _
      ContextMenuHandlers\CopyTo"

   Private strClSID As String = "{C2FBB630-2971-11D1-A18C- _
      00C04FD75D13}"
A main Registry object gets created; it represents the Registry root: HKEY_CLASSES_ROOT. The key object represents the key we need to manipulate to get the ‘Copy To Folder’ option in our menus. The CLSID object represents the ‘Copy To Folder’ object. As mentioned in an earlier article, the CLSID is the object’s Class ID. This is how Windows sees and identifies the object. The object in this case is the desired window. For more information regarding the CLSID object in Windows Explorer, please refer to these articles:
Add the CopyTo sub procedure and the call to it:
C#
      private void CopyTo()
      {
         RegistryKey rkKey = rkReg.OpenSubKey(strKey);

         if (rkKey == null)
         {

            try
            {

               rkKey = rkReg.CreateSubKey(strKey);
               rkKey.SetValue(string.Empty, strClSID);

            }
            catch (UnauthorizedAccessException ex)
            {

               MessageBox.Show("Error", "Error",
                  MessageBoxButtons.OK, MessageBoxIcon.Error);

            }

         }

         else
         {

            MessageBox.Show("Already installed.", "Error",
               MessageBoxButtons.OK, MessageBoxIcon.Error);

         }
      }
      private void Button1_Click_1(object sender, EventArgs e)
      {

         CopyTo();

      }
VB.NET
   Private Sub CopyTo()

      Dim rkKey As RegistryKey = rkReg.OpenSubKey(strKey)

      If rkKey Is Nothing Then

         Try

            rkKey = rkReg.CreateSubKey(strKey)
            rkKey.SetValue(String.Empty, strClSID)

         Catch ex As UnauthorizedAccessException

            MessageBox.Show("Error", "Error", _
               MessageBoxButtons.OK,  MessageBoxIcon.Error)

         End Try

      Else

         MessageBox.Show("Already installed.", "Error", _
            MessageBoxButtons.OK, MessageBoxIcon.Error)

      End If

   End Sub

   Sub Button1_Click(sender As Object, e As EventArgs) _
         Handles Button1.Click

      CopyTo()

   End Sub
The preceding sub procedure simply creates the Registry key you initialized earlier and does some error trapping. If the setting and the key already exist, a MessageBox will inform you.
Adding an extra menu option to the Send To menu is not so easy. You need to manipulate the shell object and create the shortcut with its help and with the help of the Windows Scripting Host. Once the menu option has been created, it is permanent—unless you decide to delete it manually. The Shortcuts under the ‘Send To’ menu object are created and exist in the following location:
C:\Users\<yourusername>\AppData\Roaming\Microsoft\Windows\SendTo
Follow these steps to add a Reference to the Windows Script Host Object Model that’s shown in Figure 3:
- Click Project.
- Click Add Reference.
- Select the COM tab.
- Check Windows Script Host Object Model.
- Click OK.

Figure 3: Adding a Reference
Add the Windows Script Host Object Model Namespace in your code as well.
C#
using IWshRuntimeLibrary;
VB.NET
Imports IWshRuntimeLibrary
Add the sub and its call.
C#
      private void SendToShortcut()
      {

         object shDesktop = (object)"Desktop";
         WshShell shell = new WshShell();

         string shortcutAddress = Environment.GetFolderPath
            (Environment.SpecialFolder.ApplicationData) +
            @"\Roaming\Microsoft\Windows\SendTo\" +
            System.Diagnostics.Process.GetCurrentProcess()
            .ProcessName;

         IWshShortcut shortcut = (IWshShortcut)shell
            .CreateShortcut(shortcutAddress);

         shortcut.Description = "Shortcut to Your app";

         shortcut.TargetPath = Environment.GetFolderPath
            (Environment.SpecialFolder.ApplicationData) +
            @"\Roaming\Microsoft\Windows\SendTo\" +
            System.Diagnostics.Process.GetCurrentProcess()
            .ProcessName;

         shortcut.Save();

      }
      private void Button2_Click(object sender, EventArgs e)
      {
         SendToShortcut();
      }
VB.NET
   Private Sub SendToShortcut()

      Dim shDesktop As Object = CObj("Desktop")

      Dim shell As WshShell = New WshShell()

      Dim shortcutAddress As String = Environment.GetFolderPath _
         (Environment.SpecialFolder.ApplicationData) & _
            "\Roaming\Microsoft\Windows\SendTo\" + System _
            .Diagnostics.Process.GetCurrentProcess().ProcessName
      Dim shortcut As IWshShortcut = CType(shell.CreateShortcut _
         (shortcutAddress), IWshShortcut)

      shortcut.Description = "Shortcut to Your app"
      shortcut.TargetPath = Environment.GetFolderPath(Environment _
         .SpecialFolder.ApplicationData) & "\Roaming\ _
         Microsoft\Windows\SendTo\" + System.Diagnostics.Process _
         .GetCurrentProcess().ProcessName
      shortcut.Save()

   End Sub
   Private Sub Button2_Click(sender As Object, e As EventArgs) _
         Handles Button2.Click

      SendToShortcut()

   End Sub
With the help of the Windows Scripting Host, a Shortcut gets created in the correct location for ‘Send To.’
You can download the source code for the project from GitHub.
Conclusion
Being lazy has its advantages! The Windows menu is quite easy to manipulate; feel free to explore it further.